Thursday, February 21, 2019

Tips to Move iTunes Library to New Computer


Tips to Move iTunes Library to New Computer
01 Using an External Drive

Using an external drive to transfer iTunes library to new computer is another way that can be considered, though it’s not recommended.

Step 1: Close iTunes on your old computer.

Step 2: Connect an external drive, like a USB stick, into the old computer.

Step 3: Look for the folder where your library backup is.


Mac: Go to “Finder” and then “Go > Home” from the menu bar. Double click on “Music” folder.


Windows: Go to “\Users\username\My Music\iTunes”.

Step 4: Copy and paste this iTunes folder to the external drive.

Step 5: After that, connect the external drive to your new computer and open it.

Step 6: Simply drag the iTunes folder from external drive to the Music folder (Mac) or “My Music” folder (Win) on new computer. to your new My Music folder. (Make sure that you’ve installed the latest version of iTunes first, though.)


Step 7: Open iTunes. iTunes will ask you to pick your library, so hit “Choose Library” on the dialog box.

Step 8: Look for the library that you just added by browsing for it.

There are a few limitations to this method, though:


Existing iTunes data on the new computer will be lost.


If some contents on your iTunes library are not in the same iTunes folder, you will lose media files or settings on your new computer.


The backup of iPhone/iPad/iPod was not included.
02 Using Home Sharing

Finally, home sharing is another way to move iTunes library to new computer, though it has more restrictions.

Restrictions:


You two computers should be in the same home network (wired or wireless).


Your iTunes on two computers should be signed in the same iTunes account.


This only allows the new computer to access the iTunes library on your old computer, so you need to keep the old computer open and its iTunes running. Or you cannot assess the old library on new computer.

Also Read:Windows 10 Blue Light Filter: Learn Something about Your Eyes Saver
Also Read:5 Best ExtraTorrent Alternatives after ExtraTorrent Shut Down Permanently 2019!
Make sure that both old and new computers have the latest version of iTunes.

Step 1: Launch iTunes on your old computer, and then go to File, then Home Sharing and then “Turn on Home Sharing.”

Step 2: It will ask for your Apple ID and password. Put it in, then click “Create Home Share."
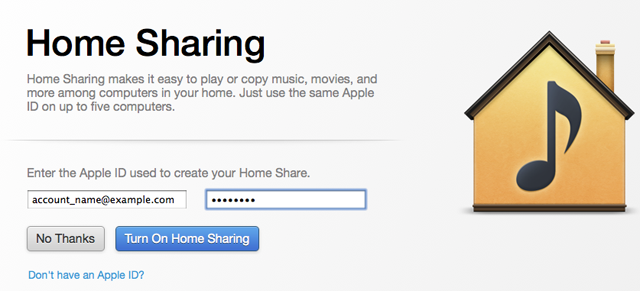


Step 3: On your new computer, hit “Account > Authorizations > Authorize This Computer” and enter the same Apple ID and password.

Step 4: Select the “Home Sharing” in the left sidebar. You will see all of your iTunes library from your old computer.

Step 5: Select contents that you want to move and click the “Import” button. Or you can click on “Edit > Select All” and click “Import” button. Then the contents will be moved to new computer.

However, sometimes it will be unable to turn on home sharing, or iTunes home sharing not working for random reasons.Sponsor ads:

Gihosoft Free iPhone Data Recovery:iphonerecovery.com

Free iPhone Data Recovery Software for Windows/Mac

Recover up to 12+ types of files, including contacts, SMS, photos, WhatsApp, Viber, notes, etc.

Restore lost data from iOS devices directly or from iTunes and iCloud backup

Recover iPhone data lost due to iOS upgrade/jailbreak, accidental deletion, device lost or broken

Support all the latest iPhone, iPad and iPod Touch

Both Free and Pro version.

If you lost data after you updated to a new iPhone, you can always use Gihosoft iPhone Data Recovery to get the data back from the old iPhone or backup.

Top 10 Best FRP Bypass Tools to Bypass Google Account on Android Device 2019

Worth reading:download youtube 1080p

If you use android phones, please choose Gihosoft Android Data Recovery

Jihosoft Android Data Recovery: the best Android Data Recovery software for Windows and Mac to recover deleted contacts, messages, photos, videos, WhatsApp and etc from Android

Tuesday, February 19, 2019

Top 5 Free Music Players for iPhone


Top 5 Free Music Players for iPhone

There’s no better price than free, and here are some of the (often ad-supported) apps that you can get from the App Store to play your music or to listen to new tunes radio-style:
Top 1 FLAC Player +

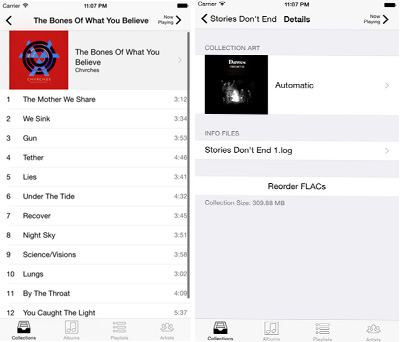
As the top 1 free iPhone music player, it can play so many kinds of files and you have a lot of different options. Whether your music is in MP3 format, FLAC, WMA, AAC, or many other formats, this music player iPhone can accommodate you. Its versatility is comparable to the popular VLC Media Player for the PC, except for your iPhone. It also lets you manage your music, which is a nice plus.
Sponsor ads:View & Share Saved WiFi Password on iPhone Xs Max/X/8/7/6s


Top 2 iTunes Radio

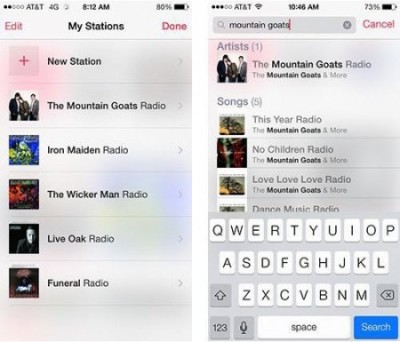
If you want to listen to streaming music like you would on a radio station, this is Apple's music player app for that. It’ll make playlists based on your preferences, and it’s already part of iOS, so you don’t have to worry about downloading it. It integrates nicely with Apple’s other music applications, and though it’s free, there’s an option to subscribe so that you don’t have to listen to the ads. Just set iTunes default music player on your iPhone.


Top 3 Pandora iPhone Music Player

Of course, Pandora has a long reputations as one of the best streaming players out there. It is similar to iTunes Radio, but has been around for much longer. It is very good at recommending music that you will like, but the ads may get on your nerves after awhile. Luckily, just like iTunes Radio, you can pay to listen ad-free.


Top 4 Musio Free

Musio allows you to use convenient gestures to control the app, just as you might on other built-in apps on the iPhone. It is simple and efficient, and you can add songs to your playlist by swiping. The biggest con to this app though is that you need to pay for the premium version to add songs to your queue.


Top 5 Spotify

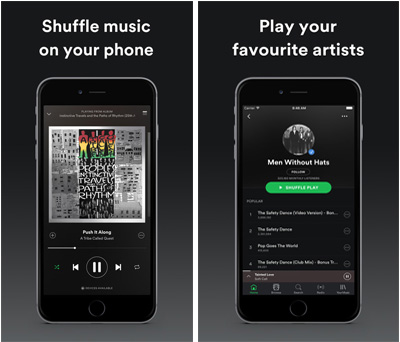
Another streaming music player iPhone, you can listen to all your favorites at will with spotify. You can listen to music, podcasts, and watch music videos. Like a lot of apps, to access better features, you will have to pay, though the app itself is free.


Sponsor ads:

Gihosoft Free iPhone Data Recovery:iphonerecovery.com

Free iPhone Data Recovery Software for Windows/Mac

Recover up to 12+ types of files, including contacts, SMS, photos, WhatsApp, Viber, notes, etc.

Restore lost data from iOS devices directly or from iTunes and iCloud backup

Recover iPhone data lost due to iOS upgrade/jailbreak, accidental deletion, device lost or broken

Support all the latest iPhone, iPad and iPod Touch

Both Free and Pro version.

If you lost data after you updated to a new iPhone, you can always use Gihosoft iPhone Data Recovery to get the data back from the old iPhone or backup.

Top 10 Best FRP Bypass Tools to Bypass Google Account on Android Device 2019

Worth reading:download youtube 1080p

If you use android phones, please choose Gihosoft Android Data Recovery


Jihosoft Android Data Recovery: the best Android Data Recovery software for Windows and Mac to recover deleted contacts, messages, photos, videos, WhatsApp and etc from Android
Back Up iPad without Passcode Using iTunes 2019


Back Up iPad without Passcode Using iTunes

If you have synced your iPad with iTunes on computer, probably your computer still remembers the iPad and won't ask you to enter the passcode when you connect your iPad. This way only works for the situation that you have synced your iPad to iTunes before. See how to operate:

Step 1: Run iTunes and connect the locked iPad via an USB cable.

Step 2: Click on the device icon at the top and under the "Backups" section, select "This computer" and make sure that "Encrypt iPhone Backup" is unchecked. Then you will create a backup that doesn't include account information or password.


Step 3: Click on "Back Up Now" and wait for the process to be finished.

Step 4: Once the backup has been created, you can erase the locked iPad including the passcode. While still connected to the computer and on iTunes, click on "Restore iPad."


Step 5: If you see a pop-up asking you to back up the device, choose "Don't Backup."


Step 6: Once the iPad has been restored, set it up as new and when you reach the "Apps & Data" screen choose "Restore from iTunes Backup." Select the new-created backup and wait for the iPad to be restored. When you complete all the process, the device will have all your information except the passcode and the iPad should be unlocked.Sponsor ads:Offline Music Apps for iPhone

Must Read:If you lost data after you updated to a new iPhone, you can always use Gihosoft iPhone Data Recovery to get the data back from the old iPhone or backup.

Gihosoft Free iPhone Data Recovery:iphonerecovery.com

If you use android phones, please choose Gihosoft Android Data Recovery

Reset and Restore the Device from iCloud 2019


Method 1 Reset and Restore the Device from iCloud

The easiest way to get your messages back if you have an iCloud backup is to restore the device to this backup. The following is how to do it.

Step 1: Begin by resetting the device. Go to Settings > General > Reset > Erase All Contents and Settings

Step 2: Once this is done, you should see the set-up screen. Follow the instructions until you get to the “Apps & Data” screen. Here, choose “Restore from iCloud Backup.”


Step 3: Sign in to iCloud and select a backup. Ensure that the device remains connected to a Wi-Fi network and wait for the process to be completed.

Sponsor ads:

Gihosoft Free iPhone Data Recovery:iphonerecovery.com

Free iPhone Data Recovery Software for Windows/Mac

Recover up to 12+ types of files, including contacts, SMS, photos, WhatsApp, Viber, notes, etc.

Restore lost data from iOS devices directly or from iTunes and iCloud backup

Recover iPhone data lost due to iOS upgrade/jailbreak, accidental deletion, device lost or broken

Support all the latest iPhone, iPad and iPod Touch

Both Free and Pro version.

If you lost data after you updated to a new iPhone, you can always use Gihosoft iPhone Data Recovery to get the data back from the old iPhone or backup.

Top 10 Best FRP Bypass Tools to Bypass Google Account on Android Device 2019

Worth reading:download youtube 1080p

If you use android phones, please choose Gihosoft Android Data Recovery


Jihosoft Android Data Recovery: the best Android Data Recovery software for Windows and Mac to recover deleted contacts, messages, photos, videos, WhatsApp and etc from Android

Monday, February 18, 2019

How to Delete WeChat History on iPhone?


How to Delete WeChat History on iPhone?

You may use WeChat itself to delete WeChat history for your iPhone. It is a convenient way to speed up your iPhone and save a lot of memory. Below you will find the steps needed to delete these messages.

Step 1: Open WeChat and go to “Me” tab.

Step 2: Go to Settings and tap on “Chat”.

Step 3: Select “Clear Chat History”.

Step 4: Select “Clear”.


Note
Will Previously Deleted WeChat History Lead to Privacy Leakage?

Most of us may think that simply deleting WeChat history through WeChat is enough. Well, this may be true to some extent. If you have only a few messages that have no private information in them, then deleting as such will be more than enough.

However, WeChat is an app that has users who communicate sensitive business or private information. You may be using WeChat to discuss strategies, financial matters and much more. Such sensitive data needs to be deleted as soon as possible.

However, deleting in the normal in this case is not enough. The data can be retrieved easily using various data recovery software and can be exploited against your interests. Therefore, such deleted history can cause a major privacy leakage.Sponsor ads:How to Turn off Tumblr Safe Mode without AccountMust Read:If you lost data after you updated to a new iPhone, you can always use Gihosoft iPhone Data Recovery to get the data back from the old iPhone or backup.

Gihosoft Free iPhone Data Recovery:iphonerecovery.com

If you use android phones, please choose Gihosoft Android Data Recovery

Restore Your iPhone from an iTunes or iCloud Backup


Restore Your iPhone from an iTunes or iCloud Backup

If you have a backup on iTunes or iCloud, simply restore the device and the videos will come back to your device. But be warned that restoring your device from an iTunes or iCloud backup could mean losing some of the data on your device that wasn’t included in the backup.


Sponsor ads:Best Free Video Converter for Windows and Mac

Must Read:If you lost data after you updated to a new iPhone, you can always use Gihosoft iPhone Data Recovery to get the data back from the old iPhone or backup.

Gihosoft Free iPhone Data Recovery:iphonerecovery.com


If you use android phones, please choose Gihosoft Android Data Recovery

Thursday, August 17, 2017

How to resend a message in the Messages app for Mac ?

Have you ever found yourself in a situation where you cannot send a message in the Messages app on your Mac? If you have, well you are not the only one. In reality, at times the Messages app for Mac becomes a cause of annoyance, as it fails to send a message correctly, forcing you to force quit the app and re-launch it.
You will get a little red exclamation point and a message saying “Not Delivered” when your message fails to deliver properly in the Messages app for macOS. If you are experiencing the issue, don’t worry because we are here to help.
In this step-by-step guide, we will walk you through the steps to resend a message in the Mac Messages app. Before we proceed with troubleshooting, make sure that your Mac is running macOS Sierra and connected to a Wi-Fi network.

Sponsor ads:Top 7 Websites to Stream Your Favorite Christmas Movies in 2018

Sponsor ads:Share YouTube Video at Specific Time from App and Browser

Steps to resend a message in the Messages app on your Mac

Step one: First off, you need to open the Messages app on your Mac and then head to a messaging thread that contains failed message
Step two: Next up, you will notice that there is a little red exclamation point next to the failed message and a “Not Delivered” message. All you need to do is to click on that exclamation point to proceed
Must Read:iPhone is disabled connect to itunes bypass
Must Read:delete wechat account
Must Read:enigma recovery Jihosoft iPhone Backup Extractor Extract and recover all types of data from iPhone backup files, such as camera roll photos, videos, SMS, contacts, reminders, WhatsApp, and etc.

Gihosoft Free iPhone Data Recovery is a professional iPhone Data Recovery software to get back all your lost text message, photo, video, call history, note, contact and more from iPhone/iPad/iPod Touch.

Step three: Once you do that, from the pop-up message, you need to click on Try Again button to resend the message in the Messages app on your Mac
Step four: Your message will attempt to resend (Make sure that you have an active internet connection).

Steps to resend a message in the Messages app on your iPhone

If your message fails to send from iOS Messages app, make sure that you have already enabled SMS Sending on your iPhone. If not, here is how to enable it.
Step one: Launch the Settings app from your home screen and then head to Messages
Step two: Next up, look for the switch next to “Send as SMS”. If it is now turned off, make sure that you turn it back on
Step three: Exit out of the Settings app, re-launch the Messages app and re-send your message.
If the problem still persists, try rebooting your device. Once your device finishes booting up, launch the Messages app and try sending your message.